Honoring Prasadam: Four of Srila Prabhupada’s Favorite Recipes

Srila Prabhupada honoring prasadam.
This year, ISKCON is celebrating the 125th birth anniversary of its Founder-Acharya His Divine Grace A.C. Bhaktivedanta Swami Prabhupada, born in 1896 in Calcutta.
Among his many contributions, Srila Prabhupada taught his disciples how to prepare food with love for Krishna, or God, and how to offer it to the Lord and accept the sanctified food as “prasadam,” meaning “mercy.” Under Prabhupada’s direction and inspiration, there are now around 110 restaurants serving pure vegetarian cuisine in the form of prasadam around the world, and Food For Life global charities feed millions daily.
For Srila Prabhupada, prasadam was a spiritual practice. “It’s the beginning of our spiritual lives,” says Srutirupa Dasi, who served as Prabhupada’s cook, assisting Palika Dasi, from 1975 to 1977. “Not only does it purify us, but it’s a complete meditation -- the shopping, the cooking, the offering, and then the eating. It all goes together.”
She explains how Prabhupada honored prasadam, giving his full attention to Krishna’s mercy without the common distractions many are used to such as watching TV, driving, or chatting while eating: “Srila Prabhupada ate in silence, and he ate alone. It wasn’t eating, he was actually relishing. He was meditating on each dish. He saw Krishna in everything.”
One of the most important elements of cooking in Krishna consciousness is the idea that we are cooking for God, not for ourselves, and hence cooking for Krishna helps us develop love for Him. “Prabhupada said, ‘We cook what Krishna likes,’” Srutirupa explains. “And he would tell us, ‘I like what Krishna likes.’”
With that in mind, here are four of Srila Prabhupada’s favorite prasadam dishes (scroll to the bottom for the full recipes and cooking directions).
1. Kachoris

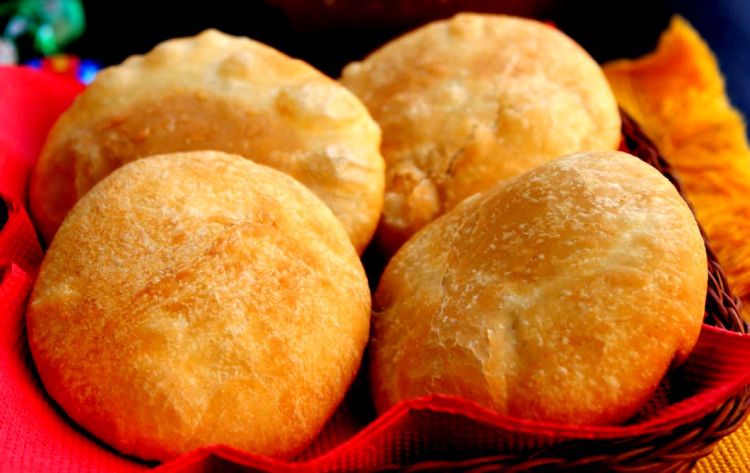
Kachoris
Kachoris, fried spicy pastries filled with urad dahl or vegetables, are famously beloved by Srila Prabhupada. He was so fond of them that growing up as a little boy in Calcutta, his nickname was Kachori-mukhi, meaning Kachori Face. According to the stories he told later, his mother and grandmother would constantly make him kachoris, which he would keep in the many pockets of his vest. He liked to watch the vendors cooking on the busy roadside, and would accept kachoris from them and also from his neighbors, until all his inside and outside vest pockets were filled.
Much later, while Prabhupada was visiting Wardha, Maharashatra in December 1976 for a Gita Conference, Srutirupa Dasi made fresh pea kachoris for him. It was her very first time cooking the dish. “Srila Prabhupada got up from his seat, turned to me, and said, ‘The kachoris are first class,” she recalls. “Then he turned before he went into the bathroom, and repeated, ‘The kachoris were first class.” Then he came out of the bathroom and raised his finger, and said, “The kachoris were first class!” I thought I had arrived!”
2. Shukta
According to Srutirupa, shukta, a Bengali bitter vegetable dish made with karela or neem leaves, was daily fare for Srila Prabhupada on his lunch thali. “As soon as he sat down, he would say, ‘where is the bitter?’ she recalls. “That was the very first thing he would take, because it’s an Ayurvedic principle that you begin a meal with a bitter dish, which tells the stomach to start producing digestive enzymes.”
While staying at ISKCON Juhu in Bombay in 1974, Srila Prabhupada could be seen on the roof of his residence, cutting karela up and letting it sun dry. “He would take it with him in his suitcase to travel, because he always had to have it on a daily basis,” Srutirupa says. “He would either eat it fried, as chips, or have it in a shukta.”

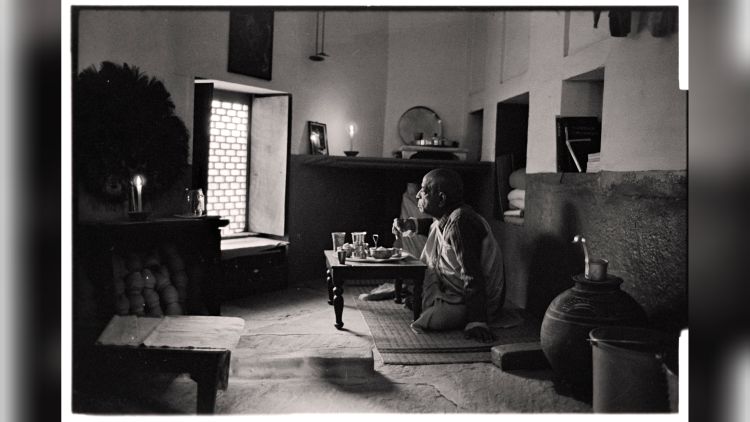
Srila Prabhupada honoring prasadam in his rooms at Radha Damodar in Vrndavan. This scene is typical of how he would eat alone; here, he is looking out at Rupa Goswami's samadhi.
3. Chidwa
Srila Prabhupada absolutely loved chidwa, a snack made with fried flat rice and shredded potatoes, along with peanuts, raisins and spices. Srutirupa recalls how Palika Dasi would serve it to him for breakfast. One morning after breakfast, Srila Prabhupada told his servant, “This chidwa is killing me,” a phrase he used freely when a dish was not so good for his health.
The next day, Palika did not put the usual chidwa on his plate. As soon as he sat down to breakfast, Prabhupada asked, “Where is my chidwa?” Palika replied, “Srila Prabhupada, it was brought to my attention that you said the chidwa was making you sick.” Nevertheless, he requested her to bring it immediately, and upon receiving the dish, he joked with a smile, “What can I do? It is too good – I can’t stop eating it!”
4. Almond Sandesh

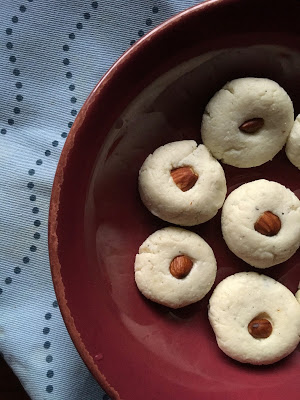
Almond sandesh. Credit: ISKCON Desire Tree
When it came to sweets, Srila Prabhupada loved hot jalebis, rasgullas, and gulabjamuns; but it was the silky smooth milk sweet sandesh that was on his breakfast plate every day while Srutirupa was cooking for him.
“His favorite was almond sandesh,” Srutirupa says. “He called it badam, which means almond in Bengali. Sandesh is a Bengali sweet, so it's something that he was used to growing up with.”
Srila Prabhupada would sometimes ask his cook to leave some sandesh in a jar in case he got hungry at night while translating his books. While in India, he would also ask a disciple to go out and purchase milk sweets such as sandesh, which he would pass out to guests.
“Prabhupada had guests come to his room every evening,” says Srutirupa. “Nobody left without prasadam.”
And what better to offer them than sandesh? “Sandesh is considered the king of Bengali sweets,” Srutirupa explains. “It's simple, but it's actually a very elegant confection. And it’s quick and easy to make.”
***
Recipes

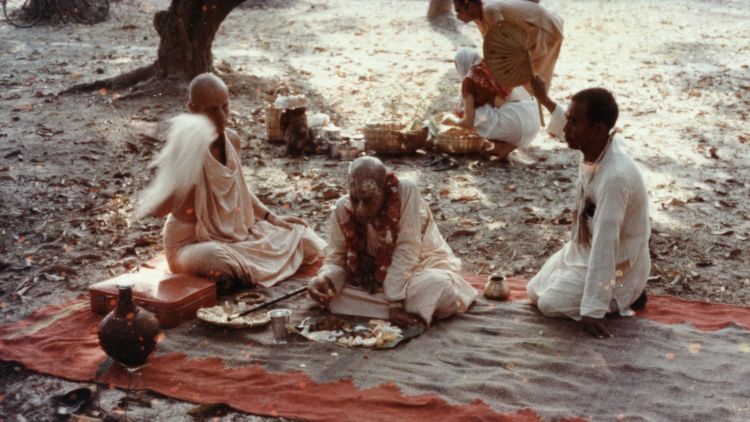
Srila Prabhupada eating breakfast in the mango grove on his last trip from Mayapur to Calcutta in 1977. Srutirupa Dasi, in the white sari with the red border, is preparing his breakfast.
Pea Kachoris
Recipe by Yamuna Devi, from Lord Krishna’s Cuisine
Ingredients:
2 cups (235 grm) unbleached white flour
1 teaspoon salt (5ml)
1/8 teaspoon sugar (0.5)
4 Tablespoons (60ml) ghee or unsalted butter, softened
7-9 Tablespoons (105-135ml) ice water
1 2/3 cups (400 ml) new peas or frozen baby peas, steamed
1 Tablespoon (15 ml) ghee or unsalted butter
2-3 hot green chilies, seeded and minced
1-inch (2.5 cm) piece of scraped, minced fresh ginger root
¼ teaspoon (1ml) yellow asafetida powder (hing0
1 teaspoon (5ml) garam masala
½ Tablespoon (2ml) lemon juice
1/8 teaspoon (0.5 ml) baking soda
1 teaspoon of sugar
Ghee for deep-frying
1. Blend the flour, salt, and sugar in a mixing bowl. Add the softened ghee or butter and rub it in with your fingertips until is fully incorporated and the mixture resembles coarse breadcrumbs. Add a scant ½ cup (120 ml) of ice water and quickly work the ingredients to moisten the flour evenly until it can be gathered into a rough dough. If necessary, add the remaining water or as needed to make a non-sticky, kneadable soft dough. Knead on a clean surface for about 8 minutes or until the dough is smooth and pliable. Shape it into a ball, wrap with plastic and set aside in a cool nook to rest for ½ hour -1 hour while making the stuffing. (The dough can be made up to 2 days in advance, well-sealed and refrigerated. Bring it to room temperature before shaping and stuffing the kachoris.)
Alternately, fit a food processor with the metal blade, combine the flour, salt and sugar and process until mixed. Add the softened ghee or butter and pulse about 10 times or until fully incorporated. With the motor running, slowly pour in a scant ½ cup (120 ml) of ice water and process until the dough forms a ball. Remove it, shape it into a ball, wrap in plastic and set aside in a cool place while making the stuffing.
2. Place the peas in a bowl and mash with a fork until pulpy. Heat the 1 tablespoon (15ml) ghee or butter in a heavy nonstick frying pan over moderate heat. Add the green chilies and ginger and fry for about ½ minute, then follow with the asafetida. After frying for 5 seconds add the peas, garam masala, lemon juice, baking soda and sugar and stir-fry for about a minute. Remove the pan from the heat and cool to room temperature. Divide the stuffing into 18 portions.
3. Divide the dough in half and roll each piece into a log about 9 inches (22.5 cm) long. Cut both to yield 18 pieces. Shape each piece into a smooth patty and set them aside on a plate, without touching. Cover with a damp towel or plastic wrap. Working with one piece of dough at a time, flatten it into a 2 ½ -inch (6.5 cm) patty. Gently press around the edges with your thumb and forefinger to thin slightly. Place a portion of stuffing in the center of the dough, then bring the sides of the dough over the filling to enclose it completely. Pinch the seams together until thoroughly sealed and smooth. With the pastry resting in the right palm, seam side up, press it with the heel of your left hand and flatten into a 2 ¼ -inch (6 cm) patty, about ½ inch (1.5 cm) thick. (Try to avoid thin spots in the pastry casing, for they easily burst during drying. This allows oil to enter the kachori, which makes it heavy and greasy.) Place the pastry, seam side down, on a baking tray and cover with plastic wrap or a moist towel. Shape and stuff the remaining pieces.
4. Slowly heat 2 ½ inches (6.5 cm) of ghee to 300 F (150 C) in a 10-12 -inch (25-30 cm) karai (wok) or sauté pan over moderately low heat. Slip in 9 pastries, seam side down. The ghee will automatically fall to about 225 F (107 C). Slowly fry the pastries for 24-27 minutes or until they sound hollow when tapped and turn a pale gold color. They should be delicately blistered and crisp. Use a wooden spoon for turning the delicate pastries (even chopsticks, if you are adept at using them). Remove them with a slotted spoon and drain on paper towels. Keep warm in a 250F (120 C) oven while frying the remaining pastries. Kachoris may be made several hours ahead and reheated, uncovered in a 350 F (180 C) oven for 10 minutes.
Shukta
Recipe by Yamuna Devi, from Lord Krishna’s Cuisine
Ingredients:
4 Tablespoons (60 ml) white poppy seeds
½ Tablespoon (7 ml) mustard seeds
2/3 cup (160 ml) water
2 small green bitter melon, (2 ounces / 60 grm each) or 25 slices of dried bitter melon 1/8 – ¼ inch (3-6 mm) thick
1 Tablespoon (15 ml) salt
½ - inch (1.5 cm) piece of fresh ginger
1-2 hot green chilies, seeded
3 Tablespoons (45 ml) chopped fresh coriander
1/3 cup of cream or half & half
Ghee for deep frying
3 medium sized potatoes (about ¾ pound / 340grm), peeled and cut into 1-inch (2.5 cm) cubes
1 medium sized yam, sweet potato (about ½ pound / 230 grm), peeled and cut into ¾ - inch (2cm) cubes
2 white icicle salad radishes or peeled carrots, cut on the diagonal into ½ -inch (1.5 cm) slices
2 small Japanese eggplants (about 6 ounces / 170 grm), cut into 1 -inch (2.5 cm) cubes
1 ½ cups (360 ml) green beans cut into 2-inch (5 cm) pieces (about 8 ounces / 230 grm), steamed until half cooked
4 Tablespoons (60 ml) ghee or a mixture of vegetable oil and unsalted butter
1 teaspoon (5ml) panch puran
2 ½ cups (600 ml) water or vegetable stock
1 teaspoon (5ml) garam masala
1. Combine the white poppy seeds, black mustard seeds and 2/3 cup (160 ml) in a small bowl, cover and set aside for at least 4 hours or overnight.
2. Place the fresh bitter melon slices in a bowl and sprinkle with 1 teaspoon (5ml) of the salt. Toss and set aside for at least 20 minutes. Rinse with fresh water drain and pat thoroughly dry with paper towels.
3. Place the soaked seeds and soaking water in a blender or food processor fitted with a metal blade. Cover and process for 1 minute. Add the ginger, chilies and 1 Tablespoon (15ml) of the coriander and process until smooth. Strain through a fine sieve placed over a bowl contaiing the cream or half and half. Blend with the popy seed mixture and set aside.
4. Pour ghee or oil to a depth of 2 inches (5 cm) into a deep-frying pan over moderate heat. When the temperature reaches 360 F (180 C) on a deep frying thermometer, separately fry batches of bitter melons, potatoes, yam, radishes or carrots and eggplant, until the vegetables are nearly tender and golden brown. Remove each batch with a large, slotted spoon and set aside on paper towels to drain. Take the pan off the heat.
5. Heat 4 Tablespoon (60 ml) of ghee or an oil-butter mixture in a 4 quart / liter saucepan over moderate heat. When it is hot but not smoking, add the panch puran and fry until the fenugreek seeds turn golden brown. Pour ina bout 1/3 cup (60 ml) of the poppy seed cream mixture and fry, stirring, until absorbed into the ghee or oil. Continue adding the mixture in ¼ cup (60 ml) portions, stirring, until it is all accepted into the ghee or oil. Ad the water or stock slowly and bring to a boil. Reduce the heat to low and simmer, stirring occasionally, for 10 minutes.
6. Add all of the vegetables, the remaining 2 teaspoons (10 ml), salt and the garam masala. Gently stir, cover and reduce the heat to the lowest possible setting. Cook very gently for 10-15 minutes. Remove the pan from the heat and allow the dish to rest for 10 minutes before serving. Garnish with the remaining fresh herb.
Chidwa
Recipe by Yamuna Devi, from Lord Krishna’s Cuisine
Ingredients:
½ teaspoon (2ml) turmeric
½ teaspoon (1.5 ml) cayenne pepper
1 ¼ teaspoon salt
1 Tablespoon (15ml) powdered rock candy or maple sugar
2/3 cup (95grm) peanuts
½ cup (70grm) raisins
1 ¼ cups (75grm) thick flat rice (poha)
1 Tablespoon (15ml) fennel seeds
½ Tablespoon (7ml) cumin seeds
1 large baking potato (8 ounces/230grm), peeled, coarsely shredded, soaked 1 hour in ice water, drained and patted dry
2 hot green chilies, halved, seeded and cut into long thin strips
Nut or vegetable oil for deep-frying
1. Combine the turmeric, cayenne, salt and sweetener in a bowl. And mix. Arrange mounds of peanuts, raisins, flat rice, fennel seeds, cumin seeds, shredded potatoes and chilies near the frying area. Line two large baking trays with several thickness of paper towels and keep nearby.
2. heat oil to a depth of 2 ½ inches (6.5cm) in a karai, work or deep-frying pan over moderately high heat until the temperature reaches 375 F (190 C). (Do not fill the pan over half-full). Drop in a handful of shredded potatoes, stir with a knife and fry until crisp and golden brown. Remove with a slotted spoon and drain on paper towels. Fry the remaining potatoes in the same way.
3. Reduce the heat slightly and allow the temperature to drop to 360 F (180 C). Place a handful of flat rice in a wire-mesh strainer and lower it into the hot oil. The oil will immediately froth and then within a minute, settle: the flat rice is finished when crisp abut not brown. Remove the strainer shake off the excess oil and place on paper towels to drain. Fry the remaining flat rice in this way.
4. One after another, fry each of the ingredients in batches, placing them in the strainer, then in the oil and frying until crisp and golden brown. (The raisins should be fried only until they plump.) Drain on paper towels. Combine all of the ingredients in a large bowl. While warm, sprinkle with the seasoning mixture. Cool to room temperature before storing in airtight containers.
Almond Sandesh
Recipe by Yamuna Devi, from Lord Krishna’s Cuisine
Ingredients:
Freshly made chenna cheese (page 315 of Lord Krishna’s Cuisine) made from 2 quarts of whole milk
1/3-1/2 cup (70 – 110grm) of superfine sugar
2/3 cup (100 grm) blanched whole almonds, powdered or finely ground
1. Unwrap the pressed chenna cheese and transfer it to a clean countertop, thoroughly blend in the sugar, and bray the cheese until it is without a touch of graininess. Add the ground almonds and mix in thoroughly.
2. Place a heavy-bottomed pan over the lowest possible heat, add the cheese and stirring constantly with a wooden spoon, cook for 10-15 minutes or until the surface becomes slightly glossy and the texture is slightly thickened. (The cheese will continue to firm up as it cools.)
3. Scrape the Sandesh onto a buttered tray and press it out into a 3 x 5 inch (7.5 x 10cm) smooth rectangle. When thoroughly cool, chill for ½ hour. With a sharp knife, cut it into 3 strip 5 inches (12.5 cm) long and 1 ¼ inches (3.5cm ) wide. Then cut diagonally across the strips in alternate directions to make 6 small triangles per strip. Mold the trimmings by hand into triangles.
4. When completely cool, store in single layers separate with parchment or waxed paper, in an airtight storage container. Refrigerated they may be kept for up to 4 days.
No comments:
Post a Comment